
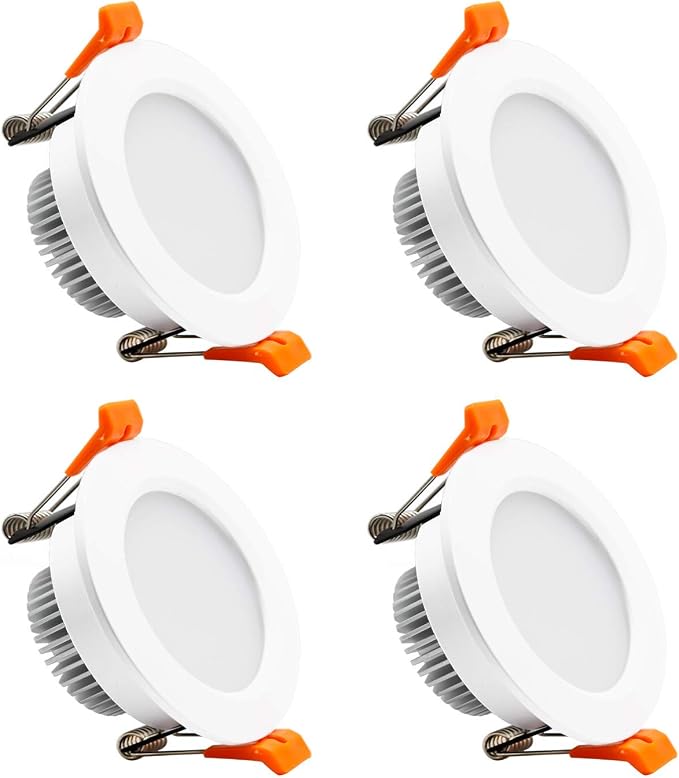
Choosing LED downlights can seem simple—until you start asking questions like: How many downlights does my room need? Should I choose 5W, 7W, 9W, or something brighter? How far apart should the lights be?
The easiest way to plan recessed lighting is not to start with wattage. Instead, work from:
Room Size → Target Illuminance (Lux) → Total Lumens → Fixture Output → Number of Downlights
This guide explains the process step by step and provides practical starting points for bedrooms, living rooms, kitchens, bathrooms, hallways, and other indoor spaces.
1. Start With the Right Brightness Level
The first step is deciding how bright the room should be.
Illuminance is measured in lux (lx). Different rooms require different levels depending on how the space is used.
| Room / Application | Recommended Illuminance |
|---|---|
| Bedroom | 100–200 lx |
| Living Room | 150–300 lx |
| Hallway / Entryway | 100–200 lx |
| Bathroom | 150–300 lx |
| Kitchen | 300–500 lx |
| Study / Work Area | 300–500 lx |
For comfortable general lighting in most bedrooms and living rooms, around 150–200 lux is a practical starting point.
Kitchens and workspaces normally benefit from higher illumination because tasks such as cooking, reading, and detailed work require better visibility.
2. Calculate the Total Lumens You Need
Once you know the room size and target lux, calculate the approximate amount of light required.
For example, a 12 m² bedroom with a target of 150 lux would require approximately:
12 × 150 = 1,800 lumens
That means your downlights should provide roughly 1,800 lumens combined.
This does not mean one fixture needs to produce 1,800 lumens. The total output can be divided between several recessed lights to provide more even illumination.
3. Convert Total Lumens Into Downlight Quantity
Next, check the lumen rating of the downlight you are considering.
LED efficiency varies by fixture design, LED chip, optics, color temperature, and driver.
As a rough planning estimate, many residential LED downlights may operate around 80–100+ lumens per watt, but the actual lumen specification of the product should always be used when available.
For example, if a downlight produces approximately 630 lumens and your room requires 1,800 lumens:
1,800 ÷ 630 ≈ 2.86
You would normally use approximately 3 fixtures.
If you prefer a brighter room or want more even light distribution, using four lower-output fixtures instead of three higher-output fixtures may provide a more balanced result.
4. Recommended Downlight Quantity by Room Size
The following table provides a practical starting point based on approximately 150 lux ambient lighting and a 2.6 m ceiling height.
| Room Size | Typical Application | Suggested Configuration |
|---|---|---|
| 3–5 m² | Small foyer / hallway | 5W × 2–3 or 7W × 2 |
| 6–10 m² | Small bedroom / study | 7W × 3–4 or 9W × 2–3 |
| 11–15 m² | Bedroom / small living room | 9W × 4–5 or 12W × 3–4 |
| 16–20 m² | Living / dining room | 12W × 4–6 or 15W × 4–5 |
| 21–30 m² | Large / open living room | 12W × 6–8 or 15W × 5–7 |
These numbers should be treated as a starting point rather than a fixed rule.
Actual lighting performance can change depending on:
- Fixture lumen output
- Ceiling height
- Beam angle
- Wall and floor colors
- Furniture placement
- Natural daylight
- Desired brightness
- Whether other lighting sources are used
For the most accurate result, always check the lumen specifications of the actual downlight before deciding the final quantity.
5. How Far Apart Should Downlights Be?
Even if you have enough total lumens, poor spacing can create bright spots and dark areas.
A simple starting guideline is:
- Position the first row approximately 0.5–0.8 m (1.5–2.5 ft) from the wall.
- Keep fixtures distributed evenly across the ceiling.
- Fixture spacing can be approximately 1.0–1.5 × ceiling height, depending on beam angle and desired coverage.
- For a simple preliminary layout without detailed photometric data, approximately 1.0–1.2 × ceiling height can be used as a reference.
Beam angle also matters. A wider beam spreads light across a larger area and is generally better for ambient room lighting, while a narrower beam concentrates the light for accent lighting.
Avoid designing a room based on spacing alone. Fixture output, beam angle, and placement should work together.
6. Example: Planning Downlights for a 12 m² Bedroom
Step 1: Choose the Target Brightness
For a comfortable bedroom, use approximately:
150 lux
Step 2: Calculate Total Lumens
12 m² × 150 lux = 1,800 lumens
Step 3: Select the Fixtures
If each 7W downlight produces approximately 630 lumens:
1,800 ÷ 630 ≈ 3 fixtures
So three fixtures can provide the required theoretical light level.
If you prefer a brighter room, possible configurations include:
- 9W × 3 fixtures
- 7W × 4 fixtures
Using more fixtures at a lower individual output can also help distribute light more evenly.
Step 4: Plan the Layout
Position the fixtures evenly while keeping approximately 0.6–0.7 m from the walls as a starting point.
Also consider wardrobes, beds, shelving, and other furniture so the lighting does not create unnecessary shadow areas.
7. Don't Choose Downlights by Wattage Alone
Wattage is useful for understanding energy consumption, but it does not tell the complete story. When comparing LED downlights, pay attention to the following specifications.
Color Temperature
Color temperature affects how warm or cool the room feels.
- 2700K–3000K: Warm, comfortable light for bedrooms and relaxing living spaces
- 4000K: Neutral white for kitchens, work areas, and general-purpose lighting
- 5000K–6000K: Crisp, bright appearance for spaces where greater visual clarity is preferred
CRI
CRI, or Color Rendering Index, describes how naturally colors appear under the light.
CRI 80+ works well for most everyday residential lighting.
For kitchens, retail displays, wardrobes, artwork, hospitality environments, or other areas where color accuracy matters, a higher CRI may be preferable.
Beam Angle
Choose the beam angle according to the purpose of the light.
- Wide beam: General ambient lighting
- Medium beam: Balanced general and focused lighting
- Narrow beam: Accent lighting, artwork, shelves, and display areas
Dimming
Dimmable downlights give you greater control over brightness and atmosphere.
For example, the same living room can be bright during daily activities and dimmed for movies or evening relaxation.
When using dimmable fixtures, always confirm that the LED downlight and dimmer are compatible.
IP Rating
For bathrooms, showers, or other areas exposed to moisture, choose fixtures with an appropriate waterproof or moisture-resistant rating.
IP65 products are commonly considered for wet-area applications, but installation requirements depend on the exact location and local electrical regulations.
Cutout Size
This is especially important when replacing existing recessed lights.
Always check:
- Ceiling cutout diameter
- Fixture diameter
- Installation depth
- Ceiling clearance
A fixture with the correct wattage but the wrong cutout size will not fit your ceiling opening.
8. Which Type of LED Downlight Should You Choose?
For Bedrooms and Living Rooms
Choose a recessed downlight with comfortable light distribution and dimming capability.
A frosted or anti-glare design can help create softer ambient lighting for spaces where visual comfort is important.
For General Home Lighting
Standard recessed LED downlights are a practical choice for bedrooms, living rooms, hallways, dining areas, and other everyday applications.
LightingWill offers recessed downlights in multiple wattages, color temperatures, housing finishes, and lighting styles, making it easier to match different room layouts and applications.
For Accent Lighting
Adjustable or narrow-beam COB downlights are useful when you want to highlight:
- Artwork
- Feature walls
- Shelving
- Displays
- Decorative objects
Directional lighting gives you greater control than a standard fixed downlight.
For Low-Ceiling or Renovation Projects
An ultra-thin recessed downlight can be useful when ceiling installation space is limited.
Always verify fixture height and cutout dimensions before installation.
For Bathrooms and Wet Areas
Use a fixture specifically rated for the environment rather than installing a standard indoor downlight in an exposed wet location.
9. Quick Checklist Before You Buy
- Room brightness: Do you want approximately 150 lux for comfortable ambient lighting or closer to 300 lux for a brighter space?
- Total lumens: Does the combined fixture output meet your estimated room requirement?
- Layout: Can the lights be spaced evenly without creating obvious dark areas?
- Color quality: Does the color temperature and CRI suit the room?
- Environment: Do bathrooms or wet areas require a suitable IP-rated fixture?
- Installation: Does the fixture cutout and installation depth match your ceiling?
Getting these details right before purchasing can save significant time during installation.
Find the Right Recessed Lighting for Your Space
There is no single downlight wattage or quantity that works for every room.
The most reliable approach is:
Then consider the details that shape the final lighting experience: color temperature, CRI, beam angle, dimming, cutout size, ceiling height, and IP rating.
Whether you're upgrading a bedroom, designing a new living room, or planning lighting for a larger project, starting with the right calculations will help you create a space that feels balanced, comfortable, and well lit.

Hinterlasse einen Kommentar
Diese Website ist durch hCaptcha geschützt und es gelten die allgemeinen Geschäftsbedingungen und Datenschutzbestimmungen von hCaptcha.